Altered Art & Scrap Playground
will be closed
Friday & Saturday, Sept. 14th & 15th
(normal business hours resume Tuesday, the 18th)
I'm very sorry for the inconvenience.
There will be a layout class on Tuesday, Sept. 18th. I don't have the photos up yet, but they are coming soon. Here are the details and a little peek at the colors that are involved in this class. I love them!

Tuesday's Layout Class
Date: September 18th
Time: 6-9 PM
Cost: $16.00
Bring: paper trimmer, scissors, adhesive and pop dots.
Call 721-7529 or email scrapandplay@rushmore.com to reserve your spot for class!
(and I will get photos up later today!)
LOTS OF NEW STUFF IN THE STORE!!!

Stamping Gear! They're here!
These were released at the winter CHA in January, but they didn't ship until late August. They are here now! This looks like so much fun. Probably mostly because it reminds me of the old Spirograph that some of us remember playing with as kids. I haven't had a lot of time to play with this yet, but think it will be great for adding that little something you need for a "bald spot" on your scrapbook pages. This set seems a little big for cards, but I have been thinking about doing an 8x8 square with a pattern, then cutting it into 4x4 pieces, giving them a little extra ink and making them into a 4 1/4 x 4 1/4 card set.
A larger wheel/cog arrived yesterday, and you can stamp on the outside of it for an even larger image or the inside of the wheel, which might make a smaller pattern, more suitable for cards.
Stop in and take a look...I have a set in the playroom that you can play with.

Here is another new item from Winter CHA that has finally shipped. The Genius Platform from Lifestyle Crafts. The kit comes with a brand new MAGNETIC platform. It also includes two mats, one for cutting and one for embossing. The cutting mat is new and improved, longer-lasting with less curling. (no more cracking so loud, you think someone has been shot!) As a bonus, the kit includes a one-of-a-kind nesting die set!
Lots of embellishments!


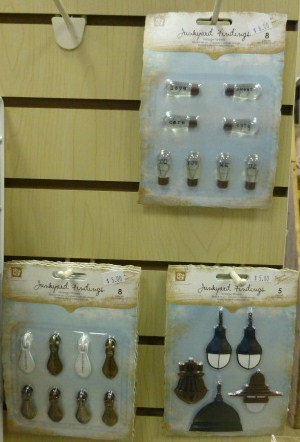
Some really fun embellishments from Prima arrived this week! There are all sorts of resin embellishments for your scrapbook pages, cards and any altered art you might be doing. You can ink them, spritz them, paint them, sand them, or just leave them as they are! I just love things that can be colored to match whatever you are working on. So versatile.
There are also some fun "light bulb" embellishments...big and chunky, but oh so much fun! You gotta come check it out. (mostly because some of my photos are really terrible)
Also from Prima....

Some fabulous resist canvas book covers! Get out whatever you like to color with and give these some color. I love the magic of resist. These would make beautiful one of a kind covers for journaling or photos.
Card Creator Dies are in! These are new from Spellbinders, and they are designed to fit and layer perfectly on a 4 1/4" x 5 1/5" card (A2). I have been seeing a lot of cards on Pinterest lately that are white on white, each layer has a different texture (embossing folders) or a different shape (die cuts). I think these dies would be great for that. Layer some more dry embossed pieces on top...beautiful....and EASY"!

I have been seeing beautiful, delicate die cut butterflies all over Pinterest, too. How fun are these?

Oh, and if you aren't following the store on Pinterest, you should be! Click HERE
Metallic Distress Stains.
Okay, this is mean, I know it, and I'm sorry.
These were in last week, I posted about them on facebook and they are now gone. BUT...more are on the way!
I love anything Tim Holtz. I also love anything metallic. So these were a no-brainer for me.
There are 3 colors, antique bronze, brushed pewter, and tarnished brass. And they are fuuuUUN!
I shared a couple of videos that I had found on the store facebook page , you should check it out. You don't have to join facebook to look at a public page, so don't get scared if you aren't into facebook. But you are missing out if you haven't liked the page yet.


Here are a couple tags I did using Broken China, Peeled Paint and Antique Bronze Distress Stains.
After smooshing ink all over, and spritzing with water until the ink pooled up a bit, I put a piece of scrunched up plastic wrap (saran wrap) over the top, scrunched it some more and then let it dry.

This one was done by scribbling the same colors of Distress Stain on a Non-stick Craft Mat. (I added a little brushed pewter to it, too.) Spritz the ink with water and then dip and drag the tag through the puddle. Dry between each dip and drag with a heat gun. The layers are so beautiful. Really, I'm in love.

I decided to do a little stamping on that last tag. I added flourishes with Rusty Hinge Distress ink (pad) and then, since these inks react with water, I decided to stamp a brick wall image with water (spray stamp with water and stamp as usual) The water lifts a bit of the color, leaving you with this wonderful, ever so subtle image. Can you see it? I stamped it on the top left and bottom right.

Then I decided it needed a butterfly....this one?

or this one?

Or maybe both?? I haven't decided yet...but I'm totally in love with the inks, and the butterflies! (which are also new in the store)
Okay...last but certainly not least...
AGED EMBOSSING ENAMEL

I have said it before, and I'll say it forever....I have the most wonderful customers! I love you guys.
One of the reasons is that you come in and tell me about or order products I've never heard of before.
Aged Embossing Enamels is one of those products...and I'm so glad you told me about them!
I fell in love with embossing powder years ago. It was magic and who can resist watching that powder turn into this sleek, shiny image? I couldn't. But, over the years, clear and black were the only colors I used anymore. Until this stuff came along.
So, it's got all this crazy texture, and colors all mixed in one jar. Teeny tiny bits, big metallic chunks, regular chunks, each a different color. It's amazing...you can layer it (embossing ink, powder, heat and repeat) and you get a different look each time you add a layer.
And in my humble opinion...Dusty Attic chipboard is it's best friend! I LOOOOOVE (<- I just sang that word to you) the combination!!!
Check it out! (those of you that have been in the store in the last few weeks have most likely seen this up close and personal because I'm in love with it!)

These photos are terrible and you really can't see the color here...it's a butterfly chippie from Dusty Attic, covered in Aqua embossing enamel.
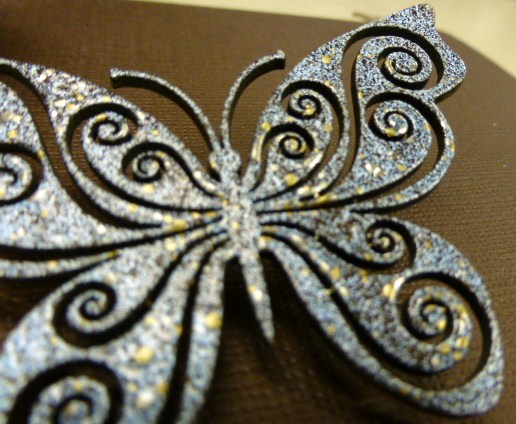
Here's a close up...sorta...
Here is one I did yesterday after getting more colors of the Aged Embossing Enamel in. It is also a Dusty Attic Chipboard. I used a Versamark pen to add the embossing powder colors right where I wanted them. A little time consuming, but I needed the distraction yesterday and it felt wonderful to create!

You don't have to use Dusty Attic chipboard, you can use any chipboard at all. I grabbed this swirl and embossed it, and I found a chipboard button in the playroom and I embossed that, too. It just looks incredible. I have stamped and embossed with it, too. and even that looks cool. Or use die cuts and cover them completely with embossing ink and then the aged embossing enamels....make your own fun embellishments!!

Alright, I think that's it for now. I will get photos for the layout class up later today.
Have a great rest of the week, remember to play a little every day, and to let those near and dear to you know that they are!!!
0 comments:
Post a Comment