I promised photos of the upcoming class this weekend.
The first class at the Playground is going to be a "smooshing" class. We are going to add inks using a foam blender to add some drama and some fun to 3 cards. We will be doing a Fall, Halloween and Christmas card.
I have photos of the first two to show you. The Christmas card is going to have to be a surprise since I am still waiting for the stamps to get here. (cross your fingers and toes that they are here by Friday...I have mine crossed!)
The cost is $10. There will be a morning class at 10 AM and an afternoon class at 1 PM. Bring a good pair of scissors to do just a little bit of fussy cutting, a paper trimmer just in case and some adhesive. A non-stick craft mat works really well with the smooshing, so bring one if you have it. (I have them available here at the Playground if you need one)
Call 605-721-PLAY (7529) or email scrapandplay@rushmore.com if you want to come play with us!
Here's a sampling of what we will be doing Saturday.
I'd love to see you there! We'll have a smooshing good time. ;o)
Tuesday, October 18, 2011
Wednesday, October 12, 2011
Attention Embossing Folder lovers!
Do I have something fun for you!
First I want to thank Donna Degan for coming in and telling me about this great little product. I had never heard of them before. I'm a big embossing folder fan and this looked like more fun than I could pass up!
They are called Easy Folder Frames. There are 7 frames in a pack, so that means fun X 7 for nearly every embossing folder you own!
What these little wonders do is keep a section of your card stock from being embossed so you can stamp an image or sentiment in that area. There have been times when I wished I could just stamp an image on that embossed piece, but it was impossible to do after it was embossed and you totally lost the image if you stamped first and then embossed it. I love that someone came up with great idea!
Here is what they look like:
You get ovals, circles, squares and rectangles. So many options with all of your folders.
I'm pretty excited about them, and had to play as soon as the package came. Here is a quick card I put together using one of the rectangle frames. (you should all be very proud of me...there isn't one ounce of smooshing on this card...and it didn't even hurt! LOL!)
Stop by the store, I'd love to show you how they work....and you are gonna love how versatile they are. It will be like getting a whole new set of embossing folders. That, my friends, is FUN!
See you soon!!
First I want to thank Donna Degan for coming in and telling me about this great little product. I had never heard of them before. I'm a big embossing folder fan and this looked like more fun than I could pass up!
They are called Easy Folder Frames. There are 7 frames in a pack, so that means fun X 7 for nearly every embossing folder you own!
What these little wonders do is keep a section of your card stock from being embossed so you can stamp an image or sentiment in that area. There have been times when I wished I could just stamp an image on that embossed piece, but it was impossible to do after it was embossed and you totally lost the image if you stamped first and then embossed it. I love that someone came up with great idea!
Here is what they look like:
You get ovals, circles, squares and rectangles. So many options with all of your folders.
I'm pretty excited about them, and had to play as soon as the package came. Here is a quick card I put together using one of the rectangle frames. (you should all be very proud of me...there isn't one ounce of smooshing on this card...and it didn't even hurt! LOL!)
Stop by the store, I'd love to show you how they work....and you are gonna love how versatile they are. It will be like getting a whole new set of embossing folders. That, my friends, is FUN!
See you soon!!
Sunday, October 9, 2011
Late Night Scrapping
....with my husband!
I know...I was just as shocked as you are! AND....it was HIS idea! Clay woke up one morning and started telling me about this scrapbook he had been dreaming about that night. He had some really great ideas which really impressed me because he doesn't pour over scrapping magazines and websites like I do for inspiration.
Well, last night after we had dinner, we went back to the store so I could work on an album I had started earlier in the day. Next thing I know, Clay is wondering if he could use my other wooden covers to make the South Dakota scrapbook he had been thinking about. So, we spent the evening bouncing ideas back and forth. He helped me make decisions on my work, and I helped him with his. I got to do all the smooshing of ink, since that is what I do best. LOL! We worked until almost midnight, and boy did we have a mess when we were done...but oh, so much fun!
I'm going to show you Clay's covers first. He wanted to make a scrapbook full of all the cool and fun pictures we have taken of the Black Hills over the years. (He takes some amazing photos...he took the one of the "Peek-ing Duck" layout I posted last month) His thought was to use some of the brochures we have been collecting to embellish the pages. So, the brown trim down the left side and the buffalo photo on the bottom are from travel brochures, he nabbed the South Dakota sticker from my stash (that I had bought from Cathy before I owned the store) and he also begged a piece of my Dusty Attic chipboard off me. I guess I must really like him.
I smooshed ink on the white parts of the SD sticker, and smooshed some Peeled Paint and Vintage Photo Distress Stain on the Leafy chipboard from Dusty Attic.
I love how he took one of the park maps to cover the inside of the back cover. We had to use some pattered paper to cover the unsightly and boring white spots...and then, of course, there was more smooshing involved. :o) Oh...and details....hubby is great at little details...check this out:
Clay wanted to do something to bring attention to and blend in the grass under the buffalo, so he took little strips of left over paper and made it look just like the grass in the picture...and it tied it all together! FUN!
He's got some really fun ideas for this scrapbook, I can't wait for you to see what he's got in store for the back cover...too cute!!
Okay....enough about the man scrapper. LOL!
Here is a look at what I started:
I was dying to use the new Generations line of paper from Simple Stories. I fell in love with it as soon as I saw it. The flowers are made from the same plaid paper as the inside of the front and back covers. The leaves for the flower were stamped and then....you guessed it.....smooshed with Distressed Ink (Peeled Paint and Spiced Marmalade...I think) I used the other piece of Dusty Attic Chipboard from the package that Clay used, but mine got embossed with Vintage Photo Distress Embossing Powder. A couple of EK Success border punches were used across the bottom and a strip of lace was used and it got a little dark ink smooshed on it, too. I found a random "A" in my stash of alpha's, and used a mix of alpha's for "Dream". I used Brushed Corduroy Distress Ink to smoosh on the bare grey chipboard. The "come true" is the cut with the Cricut Cartridge "Opposites Attract" .
I just have to tell you about one of the products I used on this album...because I was really impressed!
For any of you that have used the ColorBox Chalk Ink Cat's Eye pads...you know how they fall apart when you've used them for a while? Well, these covers are made of wood, and I used this to ink the edges of all 4 covers....they are the new chalk ink pads from Ingvild Bolme....take a look:
These have a nice little handle, and that's neat....but the fact that I used this on all of the edges of these wood covers and it still looks brand new totally impressed me!! I am pretty certain all of that intense smooshing would have destroyed the other chalk ink pads.
I noticed that these ink pads seem to have some sort of a coating on the top of the pad that looks like it might hold it all together. I had heard from some other scrappers that they had done their best to use and abuse these little guys to see if they would stay together, and they were impressed, too.
I have a few of these in stock if you are interested in trying them out. They sell for the same as the other pads, $1.99. I only have dark colors in stock at the moment, for adding that dark distressed look, but if anyone is interested in other colors, just give me a shout and I will get some other colors in.
Sorry to be so long winded this time around. I just had to share the fun and excitement of creating!
I hope you all had a wonderful weekend!!
I know...I was just as shocked as you are! AND....it was HIS idea! Clay woke up one morning and started telling me about this scrapbook he had been dreaming about that night. He had some really great ideas which really impressed me because he doesn't pour over scrapping magazines and websites like I do for inspiration.
Well, last night after we had dinner, we went back to the store so I could work on an album I had started earlier in the day. Next thing I know, Clay is wondering if he could use my other wooden covers to make the South Dakota scrapbook he had been thinking about. So, we spent the evening bouncing ideas back and forth. He helped me make decisions on my work, and I helped him with his. I got to do all the smooshing of ink, since that is what I do best. LOL! We worked until almost midnight, and boy did we have a mess when we were done...but oh, so much fun!
I'm going to show you Clay's covers first. He wanted to make a scrapbook full of all the cool and fun pictures we have taken of the Black Hills over the years. (He takes some amazing photos...he took the one of the "Peek-ing Duck" layout I posted last month) His thought was to use some of the brochures we have been collecting to embellish the pages. So, the brown trim down the left side and the buffalo photo on the bottom are from travel brochures, he nabbed the South Dakota sticker from my stash (that I had bought from Cathy before I owned the store) and he also begged a piece of my Dusty Attic chipboard off me. I guess I must really like him.
I smooshed ink on the white parts of the SD sticker, and smooshed some Peeled Paint and Vintage Photo Distress Stain on the Leafy chipboard from Dusty Attic.
I love how he took one of the park maps to cover the inside of the back cover. We had to use some pattered paper to cover the unsightly and boring white spots...and then, of course, there was more smooshing involved. :o) Oh...and details....hubby is great at little details...check this out:
Clay wanted to do something to bring attention to and blend in the grass under the buffalo, so he took little strips of left over paper and made it look just like the grass in the picture...and it tied it all together! FUN!
He's got some really fun ideas for this scrapbook, I can't wait for you to see what he's got in store for the back cover...too cute!!
Okay....enough about the man scrapper. LOL!
Here is a look at what I started:
I was dying to use the new Generations line of paper from Simple Stories. I fell in love with it as soon as I saw it. The flowers are made from the same plaid paper as the inside of the front and back covers. The leaves for the flower were stamped and then....you guessed it.....smooshed with Distressed Ink (Peeled Paint and Spiced Marmalade...I think) I used the other piece of Dusty Attic Chipboard from the package that Clay used, but mine got embossed with Vintage Photo Distress Embossing Powder. A couple of EK Success border punches were used across the bottom and a strip of lace was used and it got a little dark ink smooshed on it, too. I found a random "A" in my stash of alpha's, and used a mix of alpha's for "Dream". I used Brushed Corduroy Distress Ink to smoosh on the bare grey chipboard. The "come true" is the cut with the Cricut Cartridge "Opposites Attract" .
I just have to tell you about one of the products I used on this album...because I was really impressed!
For any of you that have used the ColorBox Chalk Ink Cat's Eye pads...you know how they fall apart when you've used them for a while? Well, these covers are made of wood, and I used this to ink the edges of all 4 covers....they are the new chalk ink pads from Ingvild Bolme....take a look:
These have a nice little handle, and that's neat....but the fact that I used this on all of the edges of these wood covers and it still looks brand new totally impressed me!! I am pretty certain all of that intense smooshing would have destroyed the other chalk ink pads.
I noticed that these ink pads seem to have some sort of a coating on the top of the pad that looks like it might hold it all together. I had heard from some other scrappers that they had done their best to use and abuse these little guys to see if they would stay together, and they were impressed, too.
I have a few of these in stock if you are interested in trying them out. They sell for the same as the other pads, $1.99. I only have dark colors in stock at the moment, for adding that dark distressed look, but if anyone is interested in other colors, just give me a shout and I will get some other colors in.
Sorry to be so long winded this time around. I just had to share the fun and excitement of creating!
I hope you all had a wonderful weekend!!
Wednesday, September 28, 2011
Fall and Christmas Papers
Lots of new papers in the store today! (at least it felt that way as I sat and priced each piece. LOL!)
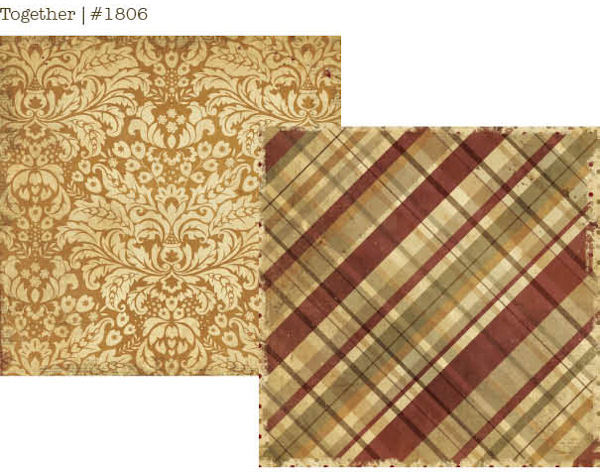
One of the lines is from Generations and it is a beautiful line of paper that reminds me of fall. I actually fell totally in love with this paper as soon as I saw it. The colors and patterns give me a warm, cozy feeling...like sitting in front of a fire. Here's a little peek:
Another line that reminds me a bit of fall...but funky, fun fall...is from TaDa. It's called BFF, the collection has some great colors and paisley's that remind me of falling leaves. Here are a couple sheets from this collection:
On to the Christmas papers...Echo Park's Holly Jolly line is very bright and playful, not to mention FUN! (I like FUN!) Take a look!
Fancy Pants has a great line out, too...check these out:
There are more colors and patterns in the store, so come on down and check them out. Whether we are ready for it or not, (and I'm not) the holidays are just around the corner. Time to get ready. :o)
Enjoy these nice warm fall days we have been having!
Thursday, September 22, 2011
Need some Inspiration?
Well, I'm certain you will find some here, in the new issues of Scrapbook Trends, Cards, Create: Holidays, Cricut Magazine and Cricut Holidays!
Wow! There is all kinds of fun packed into the pages of these magazines!
Scrapbook Trends has some great Fall and Halloween layouts, it features a section on how to use lots of photos on a page, and even a few cards that look really fun and easy to make.
Tons and tons of inspiration sitting on the counter here at the Playground. Stop by and pick up your very own issue that you can leaf through while sitting in your most comfy chair with a cup of something good to warm your bones on these cool nights.
Wow! There is all kinds of fun packed into the pages of these magazines!
Scrapbook Trends has some great Fall and Halloween layouts, it features a section on how to use lots of photos on a page, and even a few cards that look really fun and easy to make.
Cards looks like a great issue, too. Some really, really fun Halloween cards and fall cards. Quick cards...who doesn't like that? There is a technique in this one that really caught my eye...it looks almost like a rosette but is made from little paper cones...very intriguing!
Create: Holiday. Oh boy...I'm in love with this one. Stunning cards and some of the most fun and pretty holiday decorations! It covers Fall, Halloween and Christmas. This one really is packed with amazing stuff.
Cricut magazine is concentrating on Halloween and they have some of the most fun cards and treat ideas for the kids! You could spend days trying to decide which one to make! They've got fun and funky and some really beautiful things in this issue.
Last but definitely not least is Cricut Holiday's. Girls, if you don't have your Cricut out and using it...you need to! Cards, decorations, gift bags, home decor and scrapbook pages...some for Fall, but packed with Christmas ideas.
Wednesday, September 21, 2011
Halloween papers are here!
Lots of new stuff came into the store yesterday! One of the most exciting was the Halloween papers from Echo Park and My Mind's Eye. I am going to admit something here....so be gentle, no pumpkin throwing, ok? I've never been a big fan of Halloween....I know, I know...I have found out it is a really big holiday here. But, after getting these papers in...I'm a fan! These papers look like sooo much fun! I have layouts dancing around in my head right now, I can't wait to get back to North Dakota to gather up all the cute Halloween photos I have of my kids to use with these papers!
Here is a peek at the Echo Park Apothecary line:
Then there is the Mischievous line from My Mind's Eye:
Also in is the Head Of The Class line from Little Yellow Bicycle:
This is just a few pieces from this line, but there are more here at the store (some of the photos don't seem to want to cooperate today). A great line and some great colors for back to school photos.
Some of the other things that came in are more of the Viva Decor Pearl Pens, in Red (great for Christmas bling and holly berries!) Cream (looks just like a pearl) Bronze (a big hit at Saturday's Make & Take) and Dark Brown.
More LaBlanche stamps are in, along with LaBlanche's Specialty Stamping Paper. This is a coated cardstock that gives a very vivid and crisp result for these very detailed and beautiful stamps.
There are a few more colors of Distress Ink Pads to choose from, also.
Stop by and check out all the fun fall goodness!
Saturday, September 17, 2011
And the winners are...
This was a really fun giveaway. I am so excited to be able to offer it and hope you all enjoy your fun new goodies!
So, without any more torture...here are the online winners:
tldahmus said...
You know how much i love halloween! We are still planning on a weekend to come see you. do you have a schedule of classes yet? September 13, 2011 8:53 AM And to answer your question, I don't have a set schedule yet, but am hoping to have it completed this week and I will let you know as soon as I do!
Mary said...
Looking forward to more pictures of the new products! September 12, 2011 7:32 AM
Anonymous said...
Haven't met you yet, but am an addicted stamper!!! Always looking forward to new things - and love to win things too. Ellen September 12, 2011 9:28 PM Congratulations Tami, Mary and Ellen!!! Stop by anytime to pick up your winnings! I also did a giveaway for the store and the winner for that is Lorie Van Bochove! Congratulations Lorie!!
Thank you for playing...and enjoy your weekend!
So, without any more torture...here are the online winners:
Subscribe to:
Posts (Atom)